> ## Documentation Index
> Fetch the complete documentation index at: https://nuntly.com/docs/llms.txt
> Use this file to discover all available pages before exploring further.
# Generate your API key
> Learn how to create and manage Nuntly API keys. Use your key to authenticate REST API requests, SDK calls, and SMTP connections.
API keys authenticate your requests to the Nuntly API and SMTP server. Every key starts with `ntly_`.
## Create an API key
In the dashboard, go to **API Keys**.
 Enter a descriptive name for the key (for example, "Production" or "Development") and select a permission type.
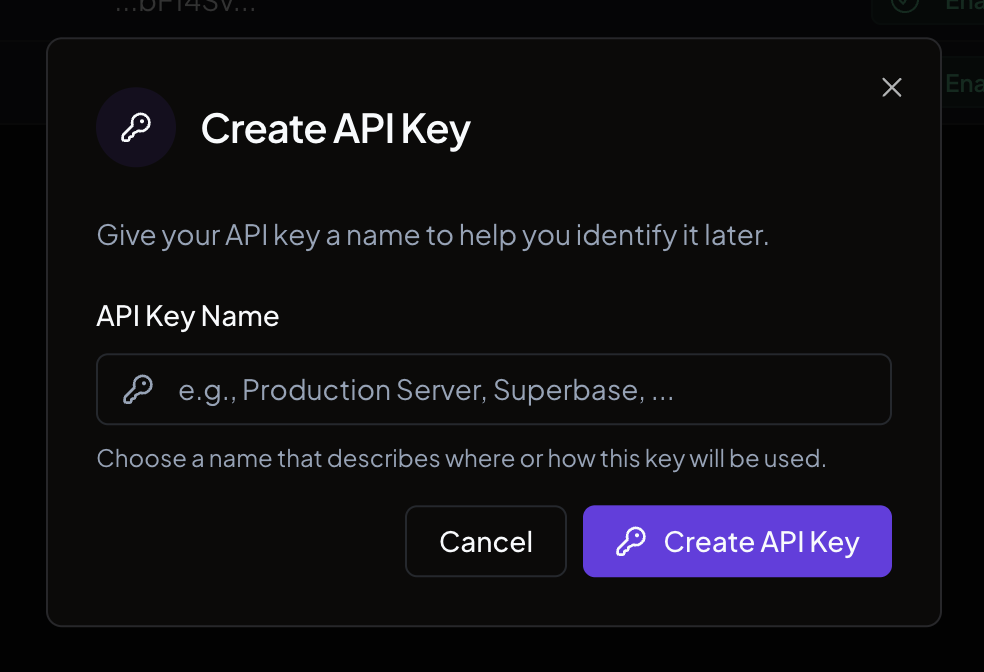 See [Permissions](#permissions) below for details on each permission type.
Click **Create API Key**.
See [Permissions](#permissions) below for details on each permission type.
Click **Create API Key**.
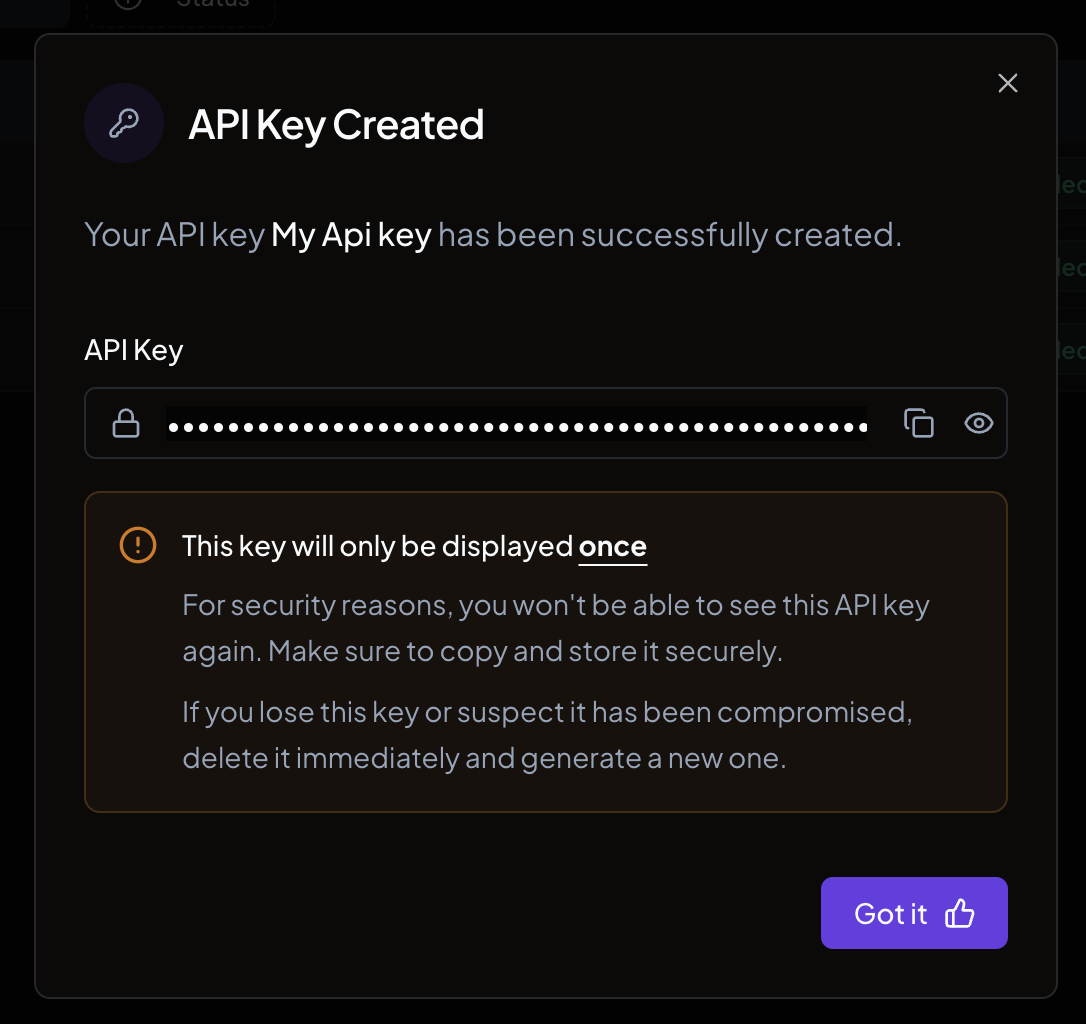 The API key value is displayed once at creation. Copy it before closing. You will not be able to retrieve it again.
Store your API key in an environment variable or a secrets manager. Never hardcode it in your source code or commit it to version control.
## Permissions
Each API key has a permission type that controls which endpoints it can access. You choose the permission when creating the key, and you can change it later from the edit panel.
### Full access
Grants read and write access to all API resources: emails, domains, webhooks, API keys, and organization (read only).
Use this for backend services that need complete API access.
### Sending only
Restricts the key to sending emails only. The key cannot read emails, manage domains, configure webhooks, or perform any other operation.
Use this for services that only need to send transactional emails, such as a notification service or a third-party integration.
### Domain restriction
When using the **Sending only** permission, you can optionally restrict the key to specific verified domains. The key can then only send emails from those domains.
If no domains are selected, the key can send from any verified domain in your organization.
### With the REST API
Set the `permission` field when creating an API key through the API:
```bash theme={null}
curl -X POST https://api.nuntly.com/api-keys \
-H 'Authorization: Bearer ntly_your_api_key_here' \
-H 'Content-Type: application/json' \
-d '{
"name": "Notification service",
"permission": "sendingAccess",
"domainIds": ["dns_01kh9g8dnk2d6k81q28tvjtw02"]
}'
```
Available values for `permission`:
* `fullAccess` - full read and write access to all resources
* `sendingAccess` - can only send emails
The `domainIds` field is optional and only applies to `sendingAccess` keys. Pass an array of domain IDs to restrict which domains the key can send from.
## Use your API key
### With the SDK
Pass your key when initializing the Nuntly client:
```typescript theme={null}
import { Nuntly } from '@nuntly/sdk';
const nuntly = new Nuntly({
apiKey: process.env.NUNTLY_API_KEY,
});
```
See [SDK setup](/docs/guides/requirements) for full installation instructions.
### With the REST API
Include the key in the `Authorization` header of every request:
```bash theme={null}
curl -X POST https://api.nuntly.com/emails \
-H 'Authorization: Bearer ntly_your_api_key_here' \
-H 'Content-Type: application/json' \
-d '{ ... }'
```
### With SMTP
Use your API key as the SMTP password. See [Send emails with SMTP](/docs/guides/send-emails-with-smtp) for the full configuration.
## Best practices
* Use a separate key for each environment (development, staging, production)
* Use **Sending only** keys for services that do not need to read data or manage configuration
* Restrict sending keys to specific domains when possible to limit the blast radius if a key is compromised
* Store keys in environment variables. Never put them in source code
* If a key is compromised, delete it immediately and create a new one
How API authentication works
Get started with the Nuntly API
Prevent duplicate email sends
Set up and verify your sending domains
The API key value is displayed once at creation. Copy it before closing. You will not be able to retrieve it again.
Store your API key in an environment variable or a secrets manager. Never hardcode it in your source code or commit it to version control.
## Permissions
Each API key has a permission type that controls which endpoints it can access. You choose the permission when creating the key, and you can change it later from the edit panel.
### Full access
Grants read and write access to all API resources: emails, domains, webhooks, API keys, and organization (read only).
Use this for backend services that need complete API access.
### Sending only
Restricts the key to sending emails only. The key cannot read emails, manage domains, configure webhooks, or perform any other operation.
Use this for services that only need to send transactional emails, such as a notification service or a third-party integration.
### Domain restriction
When using the **Sending only** permission, you can optionally restrict the key to specific verified domains. The key can then only send emails from those domains.
If no domains are selected, the key can send from any verified domain in your organization.
### With the REST API
Set the `permission` field when creating an API key through the API:
```bash theme={null}
curl -X POST https://api.nuntly.com/api-keys \
-H 'Authorization: Bearer ntly_your_api_key_here' \
-H 'Content-Type: application/json' \
-d '{
"name": "Notification service",
"permission": "sendingAccess",
"domainIds": ["dns_01kh9g8dnk2d6k81q28tvjtw02"]
}'
```
Available values for `permission`:
* `fullAccess` - full read and write access to all resources
* `sendingAccess` - can only send emails
The `domainIds` field is optional and only applies to `sendingAccess` keys. Pass an array of domain IDs to restrict which domains the key can send from.
## Use your API key
### With the SDK
Pass your key when initializing the Nuntly client:
```typescript theme={null}
import { Nuntly } from '@nuntly/sdk';
const nuntly = new Nuntly({
apiKey: process.env.NUNTLY_API_KEY,
});
```
See [SDK setup](/docs/guides/requirements) for full installation instructions.
### With the REST API
Include the key in the `Authorization` header of every request:
```bash theme={null}
curl -X POST https://api.nuntly.com/emails \
-H 'Authorization: Bearer ntly_your_api_key_here' \
-H 'Content-Type: application/json' \
-d '{ ... }'
```
### With SMTP
Use your API key as the SMTP password. See [Send emails with SMTP](/docs/guides/send-emails-with-smtp) for the full configuration.
## Best practices
* Use a separate key for each environment (development, staging, production)
* Use **Sending only** keys for services that do not need to read data or manage configuration
* Restrict sending keys to specific domains when possible to limit the blast radius if a key is compromised
* Store keys in environment variables. Never put them in source code
* If a key is compromised, delete it immediately and create a new one
How API authentication works
Get started with the Nuntly API
Prevent duplicate email sends
Set up and verify your sending domains